Whether you travel frequently, have loved ones in different time zones, or simply need to keep track of time in another location, a custom Garmin watch face with multiple time zones is the solution you’re looking for.
In this short article, I will show you two ways you can set up a watch face with two or even more time zones on your Garmin watch. For the purpose of demonstration, I will use my Garmin Fenix 7 but don’t worry, even if you have an old Forerunner 230, you should be covered!
METHOD 1.
Create a Multiple Time Zone Watch Face with a Built-in Widget
On many of Garmin’s newer and higher-end watches, such as Garmin Fenix, you can create a watch face with multiple time zones using the Alt. Time Zones widget, so first check if it’s available on your watch. If it is, continue with Step 1.
Step 1. Setting Up Alternate Times Zones
- While on a watch face, press and hold the UP/MENU button
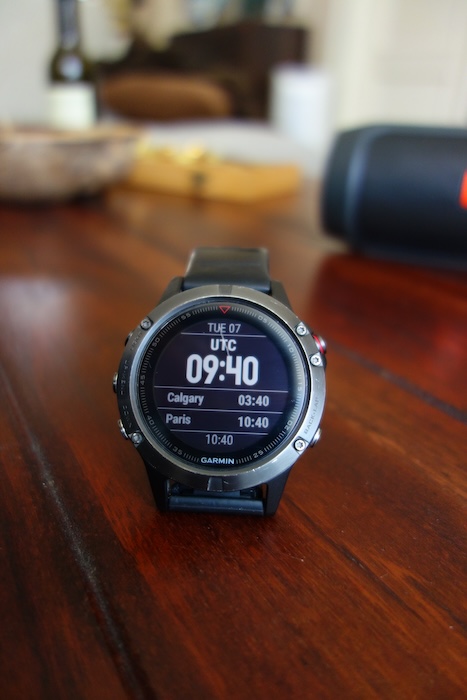
- Navigate to Clocks -> Alt. Time Zone, or in the glances, find or add the Alt. Time Zones widget
- At the bottom of the list, select + Add Alt. Time Zone.
- Choose the time zone you want to add. Optionally, you can rename the time zone.
- If you want to add multiple time zones, repeat steps 3 and 4. The initial step is done!
Step 2. Creating a Multi-Time Zone Watch Face
- While on your watch face, press and hold the UP/MENU button
- Select “Watch Face” from the menu.
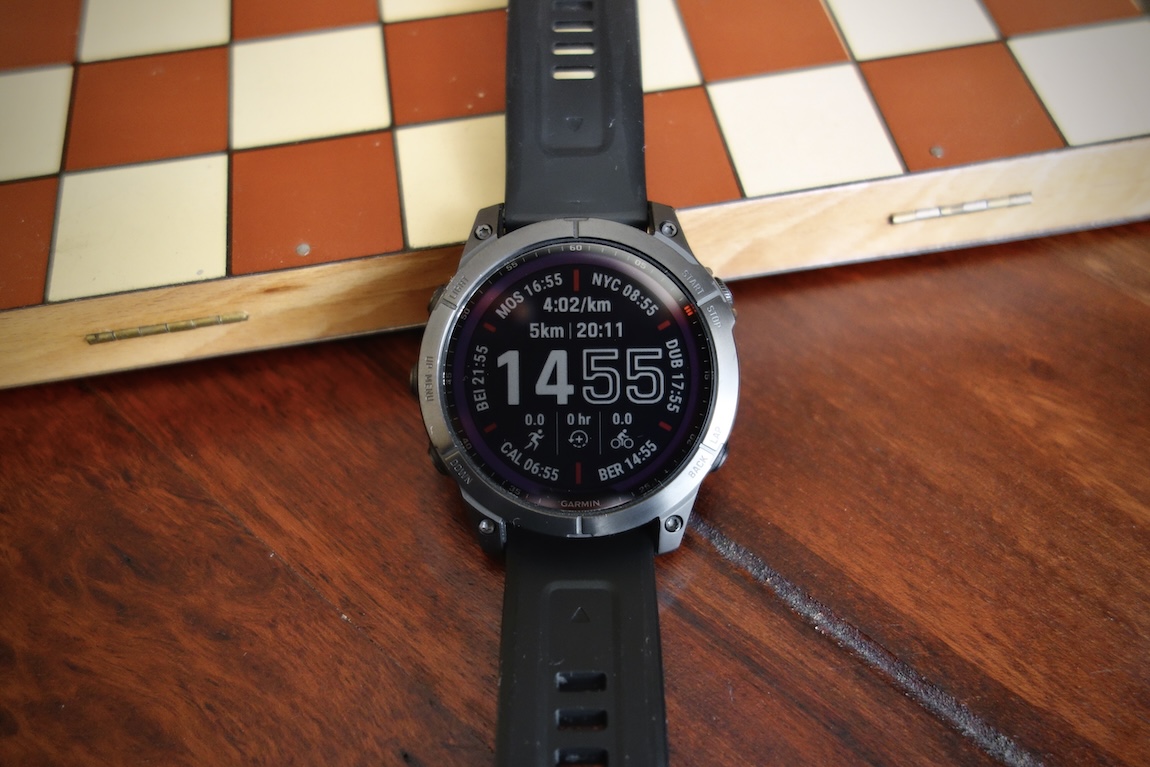
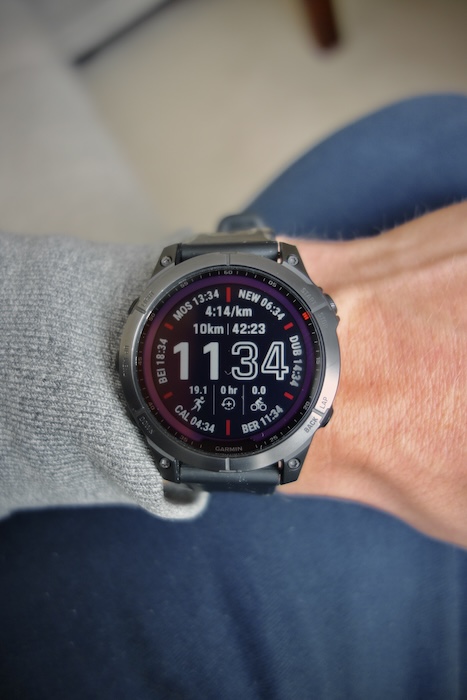
- Select your desired Watch Face from the list. Note that all watch faces allow the display at least one additional time zone, but those with circular data fields allow up to six time zones (see image).
- While viewing the desired watch face, select “Data”, and press the START/STOP button repeatedly until the first data field starts to flash.
- Use the UP or DOWN to scroll through the options until you find your desired time zone.
- To add more time zones, repeat the previous step for the rest of the data fields.
- Once all data fields are configured, select “Apply” and your multi-time zone watch face is ready!
METHOD 2.
Using a Dedicated Connect IQ Garmin App
For a seamless alternative, you can install a dedicated Connect IQ Garmin App to set up a multi-time zone watch face. Here’s how:
- Install and open the ConnectIQ App on your smartphone.
- Search for the “Multi Time Zone Digital” watch face.
- Select it and tap “Install”. Now, the watch face should be visible on your watch.
- Tap “Settings” of the Multi Time Zone Digital watch face inside the Garmin ConnectIQ app to modify time zones and other settings. Done!


![How To Import Gpx Course To Garmin Connect on iPhone [2024]](https://dialedrunner.com/wp-content/uploads/2023/09/How-To-Import-Gpx-Course-To-Garmin-Connect-iPhone_Header-1080x675.jpg)
0 Comments