

Chapter 7 of the Ultimate Guide to Running With Your Garmin Watch | Series Overview >
In this final part of the series, we’ll explore the race features of your Garmin, such as the Race Widget, PacePro, Lactate Threshold Estimate, and more. From setting up an event to formulating and executing effective pacing strategies, you’ll learn how to get the most out of your watch to maximize your race performance. Ready to beat your personal best? So, let’s dive in!
TABLE OF CONTENTS
7.1. Creating an Event: Race Widget and Daily Suggested Workouts
7.2. Pacing Strategy
7.3. How to Use The PacePro Garmin Feature
7.4. Creating The PacePro Plan
7.5. Best Garmin Running Data Screen For Racing
7.6. How to Use Garmin’s Race Predictor
7.7. Using Garmin’s Lactate Threshold Estimate
7.1. Creating an Event: Race Widget and Daily Suggested Workouts
Last year Garmin introduced their Race Widget and improved the Daily Suggested Workouts on many of their mid-tier to more premium watches. To take advantage of these features, you have to create an event (race) in the Garmin Connect app.

The biggest advantage of linking an event to your watch is that you will get Daily Suggested Workouts. These are tailored to both the nature of the race and your current fitness. So whether you are training for a 10K or 100K ultra trail race, your watch will suggest appropriate workouts for you to do. For more information about the Daily Suggested Workouts, skip to chapter two of this series.
7.2. Pacing Strategy
Now, let’s dive into some powerful pacing techniques to help you take your race performance to the next level!
- Even pacing – with this strategy, you want to keep the same pace throughout the race. It is probably the most often used by professional athletes and confirmed by research showing that a steady pace can lead to a faster overall time. Although this pacing strategy may sound easy in theory, it’s difficult in practice because it requires you to choose the right pace, which you can maintain throughout the race even after fatigue starts to set in. For this reason, this strategy is often used by seasoned athletes with quite a bit of racing experience.
- Negative split – with this pacing strategy, you want to run the second half of the race faster than the first. This is my go-to strategy as it allows me to get a “feel for the day” in the first half and then push myself to run faster in the second if I feel strong. It also helps me prevent starting too fast and later blowing up. The downside of this strategy is that if your start is too slow, you may not race to your true potential.
- Positive split – this strategy is the opposite of negative split. You want to run the first half faster than the second, which may sound more attractive for those who like to race hard from the start. Generally, this is not considered an optimal strategy according to most scientific research, as it often leads to a significant decrease in performance in the latter stages of the race.

7.3. How to Use The PacePro Garmin Feature
Garmin’s PacePro is a feature that allows you to create your custom pacing strategy for a given race and then help execute it.
There are two main options when creating your PacePro strategy:
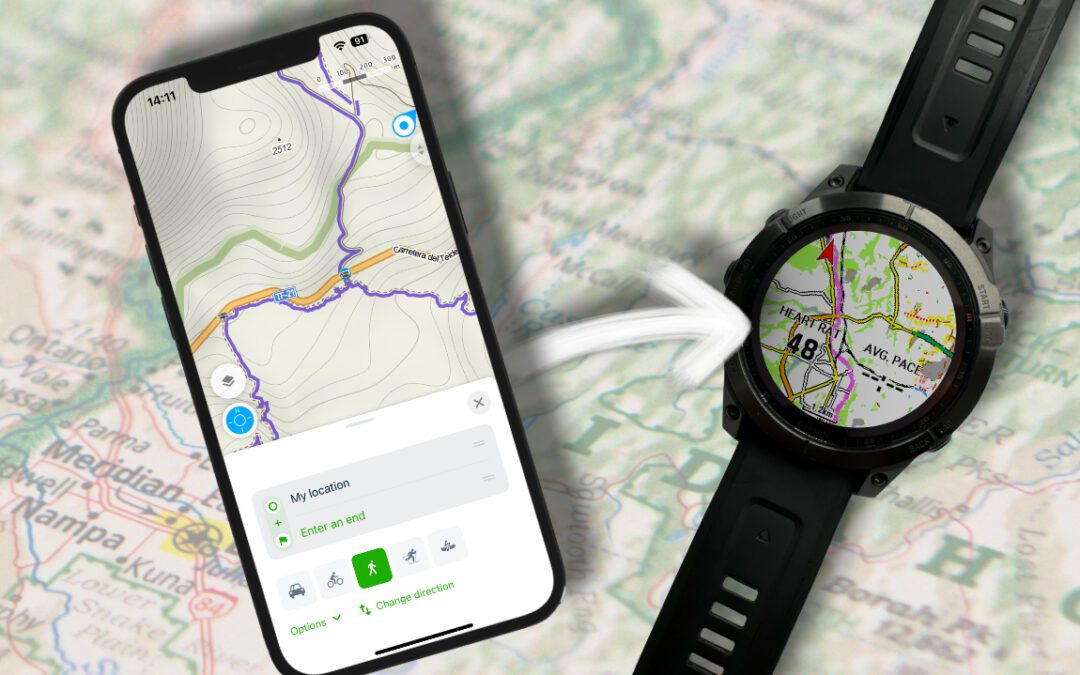
- Based on a course – it requires you to have the correct GPX course in advance.
Pros: It allows for creating a custom pacing strategy based on the elevation profile of the course and navigation on the course (helpful mainly for trail and ultra races).
Cons: Later changes to the course (change of the start line or a change in the course itself) will require you to recreate your PacePro strategy, which is not always feasible if you don’t have the updated GPX file. - Based on distance – my preferred approach for short course races.
Pros: It allows you to quickly create a pacing strategy for any distance, which is especially helpful when running an unknown course.
Cons: You don’t get to use navigation features during the race.
Over the years of using PacePro, I had multiple instances where the final race course was different than the one I planned, so I’ve stuck to the “based on distance” option. There are many things to focus on during a race, and the last thing I want to worry about is that my PacePro is based on an inaccurate course.
7.4. Creating The PacePro Plan
In this example, I will show you how I would create my PacePro plan for a 10K with a target time of 43:00.
In your Garmin Connect app, go to the “•••More” -> Training & Planning -> PacePro Pacing Strategies -> Create PacePro Strategy -> Select a Race Distance -> 10k -> Goal Time 43:00.
Now, you can set your pacing strategy with the dedicated slider. I usually move the slider slightly to the negative split side – which means I’m starting slower and finishing fast. Generally, I want my fastest and slowest split times to be at most 10-15 seconds apart. For example, my fastest split would be at 4:13/km and the slowest at 4:23/km.

You want to gauge your “weak” and “strong” split times during your preparation for the race, so you have a pretty good idea of what you can expect come race day. By keeping the slowest and fastest split times as close together as possible, you make sure your race execution will be as close to your true potential as possible. This means that if you have a good day and are feeling strong after the first few kilometers/miles, you can push yourself to run faster without losing too much time from the start. You want to be confident that the slowest split time is something you can sustain throughout the race in case your race day doesn’t pan out as you had hoped.
In case you can practice your race course before the actual event, I highly recommend doing so. This will allow you to tailor your PacePro plan to the course’s elevation profile, and you’ll be able to better gauge your effort. After you’ve run the course, you can look up the activity in Garmin Connect, where you can see your average pace times for each km/mile and then tweak the splits manually to suit your needs better.
Once you have set the pacing strategy to your liking, it’s time to save the plan and sync it to your watch. It’s probably better not to do that the night before the race ;).
7.5. Best Garmin Running Data Screen For Racing
For road races ranging from 5K to a Marathon, I use similar data fields that I would use for my standard Run profile with one exception: I like to add in a PacePro field to help me with my pacing strategy. So for race purposes, I recommend creating a second data screen in your standard Run profile that includes the following data fields:
- Distance – simple but a clear indicator of your progress during a race. Keeping an eye on the distance helps me also better gauge my effort during a race.
- Pace – gives you instant feedback on your running pace. This is helpful if you want to quickly find the pace you are aiming for.
- Lap Pace – probably the most helpful field during racing as it shows your average pace for the lap (split) of your chosen distance (1 km or 1 mile).
- Average Pace – being able to compare your average pace to your target pace can be a simple way to assess whether you’re maintaining your desired tempo throughout the race.
- PacePro Gauge – this field shows your current split pace and the target pace for the kilometer/mile you are running. If you don’t have a PacePro feature, you can write down your splits on your hand and compare them with your lap pace field.
- Heart Rate – heart rate during racing is generally higher than in training due to the adrenaline that competing brings and, thus, not the most reliable way to gauge your effort. However, for those who have been racing for some time and know their “race heart rate” range, this field can be beneficial.
Here is the layout I use:
PacePro Gauge
Distance | Avg. Pace
Pace | Lap Pace
Heart Rate
7.6. How to Use Garmin’s Race Predictor
Nowadays, many Garmin watches have a race predictor feature, which can be found on the last screen of your performance widget. This gives you an estimate of your race finish time for 5K, 10K, Half Marathon, and Marathon distances based on your VO2 max, training history, and other indicators such as age, gender, weight, etc. For this reason, it is important to record all your runs and other workouts with your watch and ensure all your information is filled in correctly.
Garmin’s Race Predictor Accuracy
Although this feature may not be completely accurate, it can give you a good estimate of what to expect on race day and if you are progressing in the right direction, meaning the estimated times are improving. Over the years, I’ve also found that the predictor tends to be fairly consistent. For example, it may predict my race time for a certain distance 1 minute slower than my actual time, but that error will tend to stay around 1 minute slower, even as my estimated times improve (hopefully :D).

To maximize the accuracy of these estimates, it is crucial that you record every workout with the watch. By doing so, you provide the watch with the most comprehensive set of data from which it can generate its predictions. This can also contribute to the consistency of the tool, improving its usefulness over time.
So next time you are racing, do not look at your race predictor only before the race but also after to see how it compares to the actual results. See what the difference is and use it as a helpful guide for the next race. You may be surprised!
7.7. Using Garmin’s Lactate Threshold Estimate
The lactate threshold is an advanced metric Garmin provides on some of its watches. It is calculated based on your heart rate data and your running pace. As a result, Garmin will give you an estimated value for your lactate threshold, which is expressed as a pace in relation to your heart rate.

If you are wondering what a lactate threshold is and what it can be used for, it is the intensity level (in this instance, gauged by pace and heart rate) at which lactic acid starts accumulating in the body faster than it can be removed. This represents a transition from primarily aerobic energy production (with oxygen) to a greater reliance on anaerobic processes (without oxygen). Contrary to popular belief, lactic acid isn’t the direct cause of muscle fatigue; it is actually a fuel for the muscle. However, the associated acidity from high-intensity exercise contributes to the sensation of muscle burn, which can indirectly affect performance.
Generally, an untrained person can exercise at this intensity for about 10-20 minutes, while highly trained athletes can hold this pace for up to 60 minutes. Of course, everyone’s different, so it’s always good to remember that these are just general guidelines.
Now, how can you apply it in your training and racing? Well, as I mentioned earlier, it can be used to calculate your training zones, which are preferable to the default zones based on the estimated maximal heart rate. You can find this on your watch under Settings -> User Profile -> Hear rate -> “Based on” and select %LTHR. Generally, I recommend using this method instead of the default %Max. HR option when available, as it offers a more personalized approach to setting up your training zones.
Additionally, the lactate threshold can be a helpful tool for pacing a race. Similarly to the Race Predictor, it won’t be perfectly accurate, but it can provide you with a good indication of what pace to run on a race day.
For example, on my Fenix 5, I had a Lactate Threshold of 4:35 min/km at a heart rate of 172 bpm, and I noticed that when I’m racing a 10K, I can maintain an average pace of 4:15 min/km for the entirety of the race. With time, as I improved my running performance, my estimated lactate threshold also improved but still remained around 20 seconds slower than my race pace. By understanding the relationship between your lactate threshold and your pace, it can become another valuable tool in estimating your race pace.
Finally, while it’s a nice feature, it has its quirks. It may do a solid job most of the time, but it’s not foolproof. It can be thrown off by a whole bunch of things, as I’m experiencing right now with my newer Fenix 7. So, think of it like your well-meaning friend who gives you directions but occasionally gets you lost because they didn’t notice the new roundabout on your route. What I’m trying to say here is to use this feature as a guide, not a gospel. It’s another tool to have in your training toolbox, but it’s one of many. Remember to listen to your body, use your common sense, and maybe get a lab test every now and then for the most accurate results.
Click here to go back to Chapter 6

![Best Garmin Fenix 7 Watch Faces [2024]](https://dialedrunner.com/wp-content/uploads/2023/11/Best-Garmin-Fenix-7-Watch-Faces-for-Different-Occasions-1080x675.jpg)
![How To Import Gpx Course To Garmin Connect on iPhone [2024]](https://dialedrunner.com/wp-content/uploads/2023/09/How-To-Import-Gpx-Course-To-Garmin-Connect-iPhone_Header-1080x675.jpg)
0 Comments